
==================
Affiliate Statement
Best Baking Tips is supported by our audience. When you purchase through one of our links, we may earn a small affiliate commission. As an Amazon Associate I earn from qualifying purchases. Your cost is not affected.
==================
How To Achieve The Perfect Crust On Homemade Bread: Simple Tips For Home Bakers
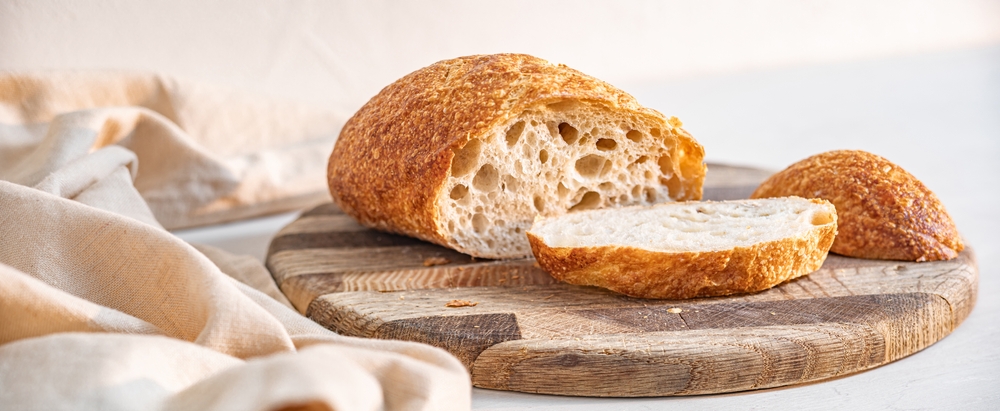
Making bread at home brings joy and satisfaction, especially when you achieve that perfect, crispy crust. I’ve spent years perfecting my technique, and I’m excited to share what I’ve learned about creating artisan-style bread with a professional-quality crust. To get a perfect crust on homemade bread, use high-protein bread flour, add steam during the first part of baking at 425-450°F, and remove moisture in the final baking stage to develop a golden, crispy exterior.

Creating crusty bread starts with selecting the right ingredients. The best crusts come from a simple mix of high-quality bread flour, water, yeast, and salt. This combination, when handled properly, creates the foundation for that satisfying crackle we all love.
The magic happens when we control the baking environment. Steam plays a crucial role in the first phase of baking, allowing the bread to expand fully before the crust sets. Then, letting the moisture escape near the end of baking creates that crispy, golden-brown exterior that makes artisan bread so special.
Key Takeaways
- High-protein bread flour and proper steam create the ideal environment for crust development
- Temperature control between 425-450°F ensures optimal crust formation
- Steam during initial baking followed by a dry environment produces a golden, crispy exterior
Starting with Quality Ingredients

Great bread starts with carefully selected ingredients and proper ratios. I’ve learned through years of baking that getting these basics right makes all the difference in creating that perfect crust.
Choosing the Right Flour Helps Ensure Perfect Crust on Homemade Bread
High-protein flour is essential for developing a crispy, golden crust. I always choose bread flour with 12-14% protein content for my crusty loaves.
The protein content helps create strong gluten networks that trap steam during baking. This is what gives us that satisfying crackle when we bite into fresh bread.
I recommend trying these flour types:
- Unbleached bread flour
- High-gluten flour
- European-style flour (Type 550 or 650)
Understanding Hydration Levels
The right amount of water plays a huge role in crust development. I aim for 65-75% hydration in my crusty bread recipes.
Here’s my simple hydration guide:
- 65%: Easier to handle, good for beginners
- 70%: Perfect balance for crusty bread
- 75%: Creates more open crumb, harder to handle
I measure my ingredients by weight rather than volume for precise hydration control.
The Role of Fermentation in forming perfect crust on homemade bread
Proper fermentation develops complex flavors and creates the compounds needed for crust formation.
I let my dough ferment in two stages:
- Bulk fermentation (3-4 hours at room temperature)
- Final proof (1-2 hours after shaping)
Temperature makes a big difference. I keep my dough at 75-78°F during fermentation for the best results.
The Kneading Process

Kneading bread dough creates strong gluten networks that give your loaf structure and that perfect chewy texture. The process involves both active work and strategic rest periods.
Related: Baking Bread from Novice to Kneader
Gluten Development Through Kneading
I recommend kneading your dough for 10-15 minutes until it becomes smooth and elastic. Start by folding the dough in half toward yourself, then push it away with the heels of your hands. Turn the dough a quarter turn and repeat.
A well-kneaded dough will feel springy and pass the windowpane test. To do this test, stretch a small piece of dough – it should form a thin, translucent membrane without tearing.
I find it helpful to dust my hands with flour instead of adding it directly to the dough when it gets sticky. This helps maintain the right ingredient balance in your recipe.
Autolyse: The Rest That Makes a Difference
The autolyse period is a 20-30 minute rest after mixing your flour and water. This simple step makes a big difference in your final bread.
During autolyse, the flour absorbs water more completely. This makes the dough easier to work with and reduces the amount of kneading needed.
I’ve found that gluten can even develop naturally during longer rest periods. Some no-knead bread recipes use this principle by letting the dough rest for 12 hours or more.
Proofing and Fermentation

The magic of bread making happens during proofing and fermentation. I’ve learned through years of baking that yeast thrives best in a warm environment, transforming your dough into a light, airy loaf.
Bulk Fermentation
After mixing my dough, I place it in a greased bowl and let it rest. This first rise, called bulk fermentation, usually takes 1-2 hours at room temperature.
During this time, the yeast feeds on the sugars in the flour, creating bubbles that help the dough grow. I look for the dough to double in size.
I like to keep my dough in a warm spot, around 75-80°F. If my kitchen is cold, I turn on the oven light and place the covered dough inside.
Shaping the Dough for Perfect Crust on Homemade Bread
Once the first rise is complete, I gently deflate the dough. This step removes large air bubbles and creates an even texture.
I shape the dough by folding it into itself, creating surface tension. This tension helps the bread rise upward instead of spreading outward.
A tight surface also creates that beautiful robust crust we all love.
Final Proofing: The Poke Test
The second rise happens after shaping. I can tell when my dough is ready using the poke test.
I gently poke the dough with my finger about ½ inch deep. If the dent:
- Springs back quickly: needs more time
- Slowly fills halfway: perfect! Ready to bake
- Doesn’t spring back: over-proofed
For extra convenience, I sometimes use cold proofing in the refrigerator. This slows down fermentation and develops more flavor.
Optimizing Baking Conditions

Getting the perfect bread crust depends heavily on creating the right environment in your oven. I’ve found that controlling temperature, using proper baking surfaces, and managing steam are the key factors that make all the difference.
Preheating Your Oven
I always start by preheating my oven at least 30-45 minutes before baking. This ensures even heat distribution throughout the oven cavity.
For most breads, I set my oven to 450°F (230°C). Your oven’s actual temperature might differ from what’s displayed, so I recommend using an oven thermometer for accurate temperature control.
A properly preheated oven gives you that initial burst of oven spring when the bread first goes in, creating that beautiful rise we all want.
Baking Surfaces: Stone, Steel, or Dutch Oven
My favorite baking surfaces each offer unique benefits:
Baking Stone:
- Maintains steady heat
- Great for multiple loaves
- Takes longer to heat up fully
Baking Steel:
- Conducts heat better than stone
- Creates crispier bottom crusts
- Heats up faster
Dutch ovens create an ideal environment for artisan bread by trapping steam naturally. I preheat mine with the lid on for the best results.
Steam: Creating the Ideal Environment
Steam plays a crucial role in the first 10-15 minutes of baking. I use these methods to add steam:
- Ice cubes in a preheated cast iron pan
- Spraying water on the oven walls
- Placing a shallow pan with boiling water on the bottom rack
Creating the right amount of steam helps prevent the crust from setting too quickly, allowing for maximum oven spring.
For high-hydration doughs, I find less additional steam is needed since they contain more internal moisture.
Perfecting the Crust

Making bread with a perfect crust requires careful attention to temperature, timing, and technique. I’ve found that creating that ideal combination of golden-brown color and satisfying crunch comes down to a few key steps.
Role of Baking Time and Temperature in Attaining Perfect Crust on Homemade Bread
I always start by preheating my oven to 425°F to 485°F (220°C to 250°C) for the best crust development. High heat is essential for that professional bakery-style finish.
I bake most standard-sized loaves for 35-45 minutes. The exact time depends on the size and shape of your bread.
A good way to check if your bread is done:
- Tap the bottom – it should sound hollow
- Internal temperature should reach 190°F (88°C)
- Crust should be firm and well-colored
Achieving a Golden-Brown Crust
The secret to that beautiful color lies in the Maillard reaction – when proteins and sugars react under heat. I enhance this by:
For a deeper color:
- Brushing with milk wash before baking
- Adding a tiny bit of sugar to your wash
- Removing the bread when it’s dark golden, not light
I’ve learned to avoid opening the oven door during the first 20 minutes of baking. This helps maintain consistent temperature for optimal browning.
Creating a Crispy, Crunchy Crust
Steam plays a crucial role in developing a crispy crust. I create steam in my home oven by:
- Placing a metal pan with water on the bottom rack
- Spraying water into the oven when I put the bread in
- Using a dutch oven for the first 20 minutes of baking
I remove the bread from the oven and let it cool on a wire rack. This prevents the bottom from getting soggy and helps maintain that satisfying crunch.
For extra crispiness, I turn off the oven and leave the door cracked open for the final 5 minutes of baking.
Final Touches and Common Pitfalls

Getting that perfect crusty exterior with a soft interior takes careful attention to detail in the final stages of bread making. A few key techniques can make the difference between good bread and great bread.
Proper Scoring Techniques
I always score my bread just before it goes into the oven. A sharp razor blade or lame works best – dull knives can tear the dough instead of creating clean cuts.
The cuts should be about 1/4 inch deep at a 45-degree angle. This helps the bread expand properly while baking.
For basic loaves, I make one long slash down the middle. For boules (round loaves), I like to create a cross pattern or wheat stalk design.
The scoring pattern affects both looks and how the bread rises. Too shallow cuts won’t allow proper expansion, while too deep cuts can make the loaf collapse.
Choosing Toppings and Glazes
These toppings enhance the final texture:
- Seeds: sesame, poppy, or sunflower
- Coarse salt
- Rolled oats
- Herbs and garlic
I brush my loaves with different glazes depending on the desired finish:
- Water: For a crispy crust
- Egg wash: For shine and golden color
- Milk: For a softer, browner crust
Avoiding Common Mistakes
I’ve learned that underproofing is a common issue that leads to dense bread with uneven holes. The dough should double in size during proofing.
Steam plays a crucial role in crust formation. I place a pan of water in the oven or spray water inside when baking begins.
Don’t cut into the bread too soon – wait at least 30 minutes after baking. Cutting too early releases steam and can make the interior gummy.
Check the internal temperature with a thermometer. Most breads are done at 190-210°F (88-99°C).
Beginner Baker: Easiest Types of Recipes for Beginning Home Bakers
Frequently Asked Questions

Getting a crispy crust requires specific techniques like steam, temperature control, and proper dough handling. I’ve tested many methods to get that perfect golden-brown exterior with a satisfying crunch.
What are the best techniques for making homemade bread crusty?
I find that adding steam during baking creates the crispiest crust. I place a metal pan with hot water on the bottom rack of my oven when I put the bread in.
Using bread flour gives me better results than all-purpose flour because of its higher protein content. This helps create that chewy texture we love in crusty bread.
What steps can I take to ensure my bread gets a golden, crispy crust in the oven?
I preheat my oven to its highest setting with a baking stone inside for at least 30 minutes. This creates the intense heat needed for a crispy crust.
I spray water inside the oven every few minutes during the first 10 minutes of baking. This keeps the dough surface moist longer, allowing it to expand fully before the crust sets.
Is there a way to make the crust on my bread crispy using a pan?
I use a Dutch oven method to trap steam and create an amazing crust. The lid keeps moisture in during the first part of baking.
I remove the lid for the final 15-20 minutes to let the crust brown and crisp up nicely.
Why doesn’t my homemade bread come out with a crispy crust?
My most common mistake was not creating enough steam in the oven. Steam keeps the dough surface flexible so it can rise fully before setting.
Sometimes my oven temperature wasn’t hot enough. I now make sure to preheat to at least 450°F (230°C) for crusty breads.
Can I achieve a thin, crispy crust on my bread at home, and if so, how?
I get great results by using filtered water in my dough and keeping the dough slightly wetter than normal.
I also score the top of my loaf right before baking. This helps control where the bread expands and creates that beautiful crackling crust.
What secrets are there to getting a crispy crust on French bread?
I turn the bread on its side when slicing to prevent crushing the crispy crust.
A long, slow rise in the refrigerator helps develop more flavor and creates a better crust structure. I often let my French bread dough rise overnight.
I always use a spray bottle to mist the loaf right before it goes into the hot oven. This extra moisture helps create that classic French bread crust.