==================
Affiliate Statement
Best Baking Tips is supported by our audience. When you purchase through one of our links, we may earn a small affiliate commission. As an Amazon Associate I earn from qualifying purchases. Your cost is not affected.
==================
Classic Single Pie Crust Recipe
Our single pie crust recipe comes from my own mother’s recipe file. My Mom made the most tender, flakiest pie crusts. My own seemed to never turn out quite right.
Miraculously, my sons and daughters took after their grandmother. In fact, they created pies that were indistinguishable from hers.
It took time, but I discovered the cause of my failures. I often tried to rush the crust. Twenty minutes is almost thirty, right? Wrong. And then I would get frustrated with the rolling process. For the single-crust pies, that might not be a big problem. It was noticeable, but not terrible. But when I baked a two-crust pie, it showed. Those patchwork pieces, spliced together, proved my inability to properly roll a pie-crust.
This recipe makes a great single crust. To make your double-crust pie, you may make two of these. Alternatively, use our double pie crust recipe.

Follow this recipe, including the times. Keep in mind that humidity affects the amount of water you need. And, if at first, you don’t succeed, try again. With practice, you will be rolling out pastry with the ease that my own mother displayed.
The following recipe makes a perfect single-crust, 8″ to 10″ pie.


Single Pie Crust
Ingredients
- 1 1/2 cups flour all purpose or pastry
- 1/2 tsp salt
- 4 tbsp shortening or use additional butter
- 6 tbsp unsalted butter very cold butter or vegan butter alternative
- 1 tbsp lemon juice or vinegar (very cold)
- 4 tbsp ice water or a little more, if needed
Instructions
- Whisk together the flour and the salt.
- Add shortening. Use a fork or pastry dough blender to mix until crumbly.
- Then add the butter. and work together until roughly crumbly. Be careful not to overwork the mixture. It should not be smooth at this point.
- Mix the vinegar with 2 Tbsp water and toss lightly to combine. Add more water, a little at a time, to make a dry, chunky mixture.
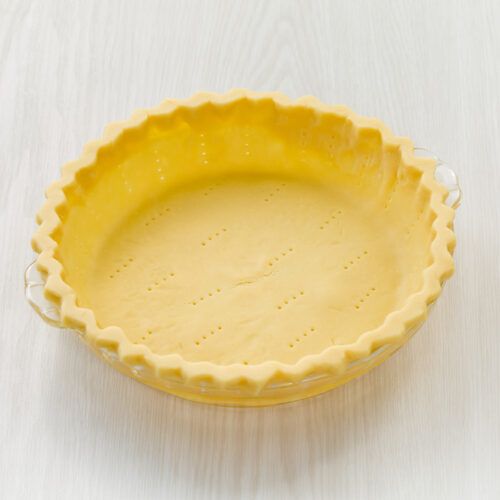
- Shape dough into a ball, flatten to about an inch thick. Cover and put in refrigerator for 30 minutes.
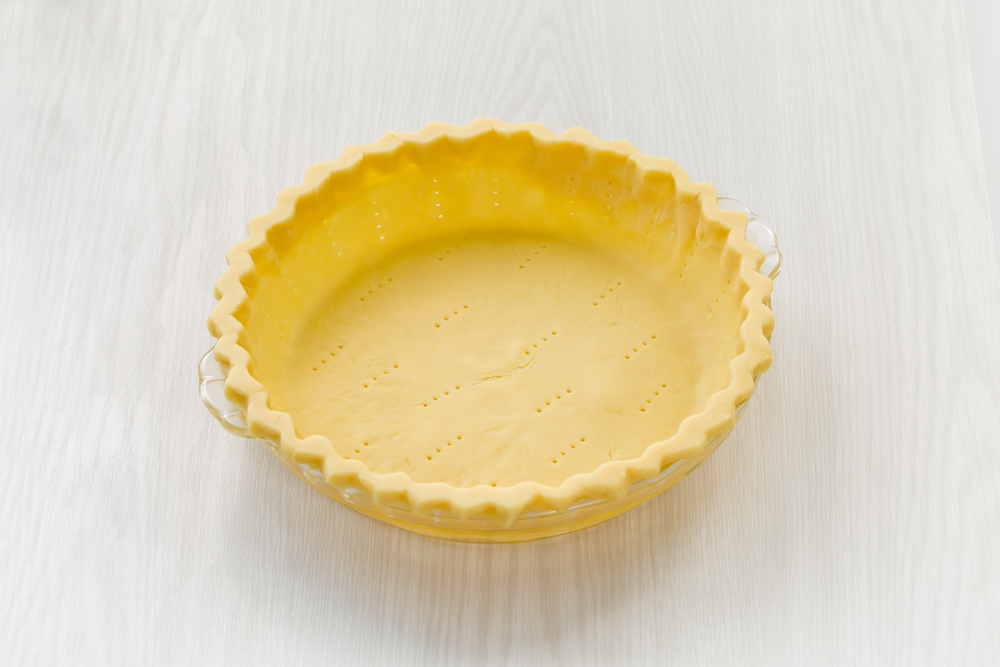
- Remove from the refrigerator. Roll out into a circle of the size needed. For a 9 inch pie, your circle will be about 12 inches in diameter.
- Add filling, if it is ready. Or put in the refrigerator until ready to fill.
- Or, if your recipe calls for a pre-baked crust, bake according to directions.

Tips for making the perfect pie crusts:
- Avoid a soggy bottom crust. To keep the bottom crust from getting soggy, brush it with egg white or melted butter, or lightly oil. Then chill before adding the filling.
- Avoid the shortening. You may substitute all butter for the shortening. Just make sure it is freezing.
- Vegan butter may also substitute.
- Make sure the butter or fat you are using is very cold.
In fact, you may even want to freeze it for 10-15 minutes before starting. The colder the fat in your dough is when it hits the oven, the flakier your crust will be. Keep all of your ingredients as cold as possible. Many bakers keep their flour into the fridge or freezer, too. And then, even after rolling it out and putting it in the pan, put it back into the refrigerator before filling. - Keeping larger pieces of fat in your flour mixture is OK as that will allow for flakiness.
Remember those pockets of fat develop into perfect little pockets of air and flaky bits when they hit the hot oven. At least, they will if they are cold. Seeing little bits of fat in our dough is the ultimate perfection. They show your skill! - Use only enough water to allow the dough to hold together when pinched with your fingers.
Too much water will make your dough tough and lose its tender, flaky magic. Use enough, just enough, but no more. - Before rolling the dough out, shape it into a disk that is less than or about 1 inch thick as this will help make it easier to roll out.
Mix up the dough, shape it into a disk, then store it in the fridge until you need it. Some bakers keep their disks ready in the freezer until they need them.I will often mix up my dough and then shape it into a disk before storing it in the fridge. Then, simply thaw it enough to roll out to the needed size. Because it is already in a disk shape and partly rolled, you don’t have to roll it as much. That keeps it cold and helps avoid over-working the dough.-
The cold truth in our single pie crust recipe
-
- Chill the dough before rolling it out.
Hopefully, by now you understand the need to keep the dough cold. Chilling the dough before rolling it out will also protect your crust from becoming overworked and chewy. - Rotate the dough 30 degrees at a time to make sure it not sticking.
Have you seen the way pizza makers throw pizza dough in the air as they stretch it? You want to do something similar, but on the counter. Roll it a bit, turn it, roll it a bit, turn it. This keeps it from sticking. It also keeps your circle from becoming an oblong. - Roll out and away from yourself keeping even pressure as you work.
Go from the middle to the outside, away from you. Turn the dough and do it again. Keep the pressure even. - Don’t force or push the dough into the corners of the pan.
In fact, ease the dough into shape. You should just let it “fall” or it will go back its original shape during baking. When you put the filling on the top of the crust, it will push the crust into the nooks and crannies. Also, trim the edges off your crust after you fill it. - Chill before filling the crust so it keeps its shape during baking and the fat is super cold before hitting the oven.
Put the crust into the pan and pop it back into the refrigerator until you are ready to add the filling. - Consider adding an egg yolk even if the recipe doesn’t call for it to help keep the dough pliable.
One baker’s secret is the egg yolk. It can save those early attempts for the perfect crust. In time, with practice, you won’t need it. But use it when you need it. It makes a big difference! - Add 1 tablespoon of vinegar or lemon juice to keep the crust more tender, if there isn’t one in the recipe.
This is actually very important! Remember, baking is a science. That tablespoon of acid makes your crust more tender. Of course, you can bake without it. Many recipes don’t include it. But try it and see if it works for you. - Try to use your fingertips to handle the dough rather than the palm of your hands.
In fact, touch your pie crust as little as possible. Warm fingers work against that very cold dough we need. Use your fingers only as much as necessary.-
-
Use the right equipment for our single pie crust recipe
-
-
- A heat-resistant glass pie pan is recommended for a flakier crust.
Glass is best. You can buy aluminum pans and even coated pans. But, if you are going out to use the pie pan, ..a glass one is the one you need to use. - Cover the edges with 2-3 inch wide strips of foil to keep the edges from getting overly brown.
Those pie crust edges will be the reason you pull your pie out before the crust is fully baked. You’ll see them get all toasty brown and freak out about them burning. Cover them so they won’t overbake and then you can leave the pie in as long as it needs. Note: you can also buy reusable plates to use instead of foil. - To make your pie shine, brush with an egg wash before baking.
An egg wash, just before baking, creates that shine, that finishing touch. Milk will often do the trick. But, there is nothing like a good egg wash on top of your pie to make it look absolutely amazing! You’ll be hooked.-
And into the oven it goes
-
- To ensure your oven is hot enough, start baking at 425 then reduce after 30 minutes.
Don’t put your pie in until the oven is preheated. You do NOT want to put your pie into an oven that is still warming up. That will completely undo all the work you did keeping it cold until it hit the oven. Get that oven good and hot so when the pie hits the oven, your crust immediately does its thing. - Bake until it is fully brown, not just golden brown.
That flaky crust won’t happen if you under-bake it. Go on the side of over-baked, please. Nice and brown is what you are aiming for. Anything less and you will be disappointed. However, avoid burning your crust! - Use a lot of flour to roll out your dough to keep it from sticking but be sure to brush the excess off before baking.
A pastry brush works quite well to brush off excess flour if needed. Although a little extra flour helps to roll out the dough, it will affect the fat to flour ratio. So, brush off as much as you can.
What type of pie will you bake? We’ve included recipes for fruit, cream, and more! For a real dessert mix-up, try our dessert pizza pies!


