==================
Affiliate Statement
Best Baking Tips is supported by our audience. When you purchase through one of our links, we may earn a small affiliate commission. As an Amazon Associate I earn from qualifying purchases. Your cost is not affected.
==================
Want to make your baked goods better? I am constantly searching for ways to improve even the best of our home baked goods. Now I’ve compiled a list of 11 ways to make your best baked goods even better!
11 Ways to Make Your Baked Goods Better
We love baking and everyone enjoys freshly baked cookies, bread, muffins, and cakes. Want even better cookies, cakes, and pies? Maybe your rolls could use a boost? It’s true. Even the most seasoned baker can use a refresher course now and then. Want to make your baked goods better? These baking tips help you make better cookies, cakes, pies, and more. In this article, we explain the things to do to make your baked goods better.
We’ll admit it: Sometimes, we fudge things when we cook. After all, who needs a recipe for simple weeknight pasta? Off-the-cuff roasted chicken is a snap. We’re big fans of that intuitive, little-bit-of-this, little-bit-of-that kitchen style because it makes our lives and our dinners easier. But when it comes to baking, we play by the rules. Baking is a science that requires precision and often doesn’t allow for creative liberties.
Senior food editor Dawn Perry and assistant food editor Claire Saffitz, both seasoned bakers, take us through why instructions like setting a timer, weighing flour, and using room-temperature eggs matter. For flakier pie crusts, moister cakes, and chewier cookies, there are just some rules that can’t be broken. So, buckle up and make your baked goods better.

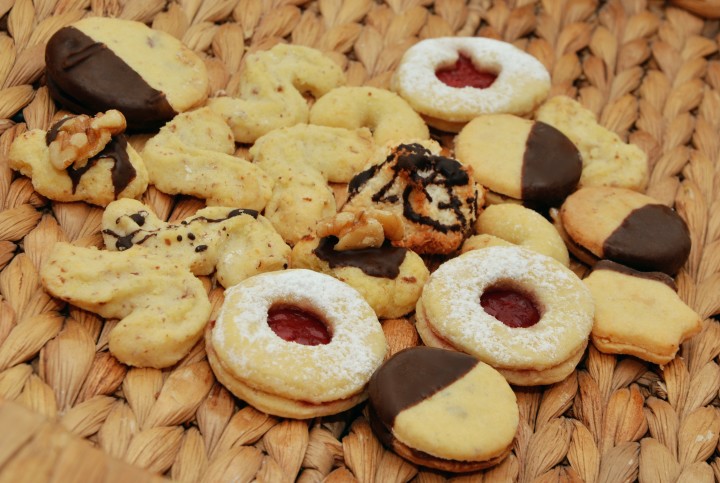
irresistible cookies
11 Things You Need to Do to Make your Baked Goods Better

1. Use Room-Temperature Ingredients
First to make your baked goods better is room-temperature ingredients. Leave this baby on the counter for better cookies.
Equally important as room-temperature ingredients are same-temperature ingredients: “Add hot things to hot things, and cold things to cold things,” Saffitz says, citing a fussy chocolate ganache as an example. If you pour piping hot cream over chilly chocolate, the cocoa fat can separate, making your sauce look oily and unappealing. That’s why many recipes call for tempering a hot ingredient with a cooler one—it ensures that the emulsion won’t seize or separate.
2. Invest in Quality Bakeware
You can bake goods successfully in a subpar oven—as we discuss tip number nine, you can adjust for hot spots and ovens in need of recalibration, Saffitz says. But all bets are off when it comes to low-quality bakeware. Flimsy, thin pans and sheet trays won’t conduct heat efficiently, causing your cake, pie, cookies, or pastries to bake inefficiently.
This is also important when it comes to mixing bowls—Saffitz insists on glass and metal ones that work best as makeshift double-boilers. “Never use plastic as a double boiler,” she says. Another consideration? Nonstick coatings can flake off over time, imparting foreign matter into your treats—it’s best to avoid them. A better way to circumvent baked-on pastries? A well-greased pan (see tip number three), a Silpat liner, or a sheet of parchment paper.
3. Butter and Flour Your Pans Generously
If you’re also flouring a pan, add in more than enough to cover, tip the pan to coat completely, then tap out the excess. Be careful where you hold it—finger marks on the interior leave the pan exposed, and are opportunities for the batter to stick. This is relevant to making your baked goods better.
4. Weigh Ingredients
Both Perry and Saffitz are strong believers in the power of a digital scale. Successful baking means eliminating as much potential for error as possible, and that means making sure your measurements are exact. A cup of flour measured in volume, for example, can vary as much as five ounces—an amount that can mean the difference between buttery and flaky—and dense and cakey. In addition, this is essential in making your baked goods better. A good digital scale—which costs you about $20—eliminates all the guesswork and the need to wash measuring cups. Don’t forget to set the tare to adjust for the weight of your mixing bowl!
Less guesswork and fewer dishes to wash? Score.
5. Toss the Old Stuff
You want to bake a loaf of banana bread. And you want you to make your baked goods better. The recipe calls for baking soda. You have baking soda. Sounds great, right? There’s just one problem: The soda’s been in your fridge since 2008. Solution? Toss it and buy a new package. The majority of ingredients used in baked goods—like baking soda, baking powder, yeast, and, yes, flour—have a relatively short shelf life, so if you don’t fire up the oven frequently, purchase them in small quantities so they don’t sit in your cupboard, quietly going rancid. If you’re not sure how fresh an ingredient is, either simply buys a new one or test it.
To check the freshness of baking powder, pour boiling water over a small quantity—if it bubbles, it’s still fresh. Flour should smell fresh and feel light, not chalky; and fresh yeast dissolved in warm (110-115˚) water will bubble and foam after a few minutes.
6. Take Your Time to Fully Complete Each Step
At one time or another, we’ve all thought, “Well, all these ingredients are going to end up in the same bowl eventually, so why not just dump ’em in together and mix it up?” Unfortunately, this easy way out only burns us in the end. It’s imperative to take the time to follow the instructions in the order they’re presented—and to do them completely and thoroughly. Creaming together butter and sugar with a handheld or stand mixer, for example, should be done before the addition of wetter ingredients, like eggs. Why? The fat in butter holds air, and, when whipped, expands. In the creaming process, sharp sugar granules slice through the butter, creating air pockets that ultimately give the pastry lift.
Skip that step (or do it half-heartedly) and your result will be dense and heavy.
Pay special attention to key instructions like “cream until light and fluffy,” “mix until just combined,” and “fold in gently.” Overmixing overdevelops gluten and deflates the air pockets you worked so hard to create, as does a vigorous or overzealous folding motion. A note on sifting ingredients: Unless it’s ultralight, ultra-delicate cake flour, or powdered sugar that needs as much aeration as it can get, it’s a step you can skip.
7. Use Salt
“If you’re looking to cut down on the sodium, baked goods are not the place to do so,” Perry says. The half teaspoon of salt added to two dozen cookies won’t set you over your daily allotment, but leaving it out will drastically change the taste of the cookie. Salt isn’t necessarily in a recipe to make it taste salty (unless we’re talking salted caramel)—it’s usually there to keep the baked good from tasting flat, one-note, or overly sweet. Salt makes other ingredients, like vanilla, almond, lemon, and sugar “pop.” One instruction they test kitchen happily ignores? Recipes that call for fine salt. Perry and Saffitz always have kosher salt close at hand, and even though iodized salt is “saltier” than coarser kosher crystals, the amount necessary is usually so small that the substitution doesn’t make a drastic difference.
Plus, heating the salt allows it to dissolve into the batter or dough, making the coarseness a moot point.
8. Rotate Halfway Through
Every oven has a hot spot, and if you don’t correct for it, you run the risk of unevenly cooked pastries—or worse, some that burn or wind up underbaked. When a recipe calls for turning a baking sheet or pan 180 degrees halfway through the process, don’t ignore it. If the back of your oven is hotter than the front, you need to give every corner and side of your concoction the same treatment. Don’t, however, open the oven constantly to check on progress—it’ll lower the temperature and alter the baking time.
This is what we mean when we say “golden brown.”
9. Don’t Mess with the Oven Temperature and Cooking Time (Unless You Should)
“Don’t try to MacGyver your baked goods!” Saffitz pleads. If a recipe for custard calls for an hour at 300 degrees, but you’re pressed for time, don’t tweak it to 30 minutes at 425: It won’t be as silky or luxuriously creamy. Cakes especially lose moisture when cooked hard and fast, and you also run the risk of burning more delicate ingredients, like an almond meal crust.
First, find out if your oven runs hot or cold—if you know that it’s consistently 25 degrees colder than what you set it at, adjust accordingly. A thermometer that lives inside your oven will eliminate any guessing, so if you don’t have one, now’s the time to invest. Equally important is that you set and use a timer. It’s easy to get distracted while your cake bakes, so don’t rely on your memory to alert you that time’s up.
Now, all that said, there’s a caveat: Perry and Saffitz agree that Americans, as a general rule, underbake their pastries. Delicate cakes tend to dry out quickly and should adhere to a strictly prescribed time. But pies? Cookies? Bread? “That baby better is deep golden brown,” Perry says. Five more minutes in the oven won’t burn an apple pie to a crisp, but it will take it from pale to handsomely burnished.
10. Let It Cool Completely (Unless You Shouldn’t)
This is an admittedly hard rule to adhere to—Saffitz cops preemptively trying to unmold fresh-out-of-the-oven baked goods. But here’s why she tries to wait: A completely cooled pastry has allowed the steam to evaporate, making the cake (or bread, or whatever) easier to handle. If you’ve taken the proper steps—namely, buttering and flouring that pan—you should have no problem unmolding once it’s properly cooled. Also, ever try to frost a still-warm cake? It’s a disaster! A melty, goopy disaster. There’s a caveat, though: Some desserts and pastries must be removed from their pans as soon as they come out of the oven, like a tarte tatin. Others, like a fragile chiffon cake, need to settle and cool completely before being handled.
So, if you want to make your baked goods better, let them cool completely.
11. Use Substitutions at Your Own Risk
Finally, we are on our last list to make your baked goods better. Real talk: There is no real substitution for white, granulated sugar. Yes, we love agave. We adore maple syrup. But these alternate sweeteners don’t have the same chemistry as those fine crystals, and a recipe that includes white sugar is a recipe that relies on the science of how it will interact with the other ingredients. Sugar does a whole lot more than sweeten—it adds color, texture, moisture, and aeration. And don’t think you can get away with slashing out half of the sugar in a recipe for a healthier version—assume that everything in the recipe is there for a reason.
Ready to Make Your Baked Goods Better Than Ever?
Try these tips and see how they work for you. Then leave us a comment below. We welcome your tips, too!
Read More:
17 Baking Recipes for Total Beginners(purewow.com)


